
After setting up MinIO on a public facing web server, one of the first things you will want to do is to secure the web frontend. Out of the box MinIO does not support multi factor authentication. Instead, the product allows you to use a third party authentication service. In this guide we’ll explore the process to do this with Google Cloud Apps and OpenID Connect. It’s relatively painless and I believe should all be doable under Google Clouds free tier.
Note: This guide assumes you are the sole user in your organisation. If this is not the case, ensure you apply appropriate roles to other users to prevent all users being granted admin access to MinIO.
Create a Project
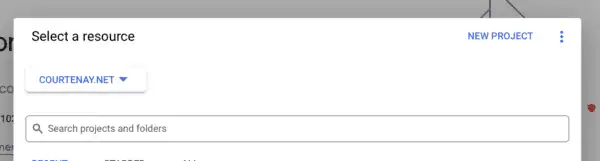
First create a Google Cloud project for the MinIO instance. Log into https://console.cloud.google.com/ and select your organisation. If you do not yet have one yet create one and follow any steps presented.
At the top of the screen is a project drop down. Expand the drop down and then click the New Project link.
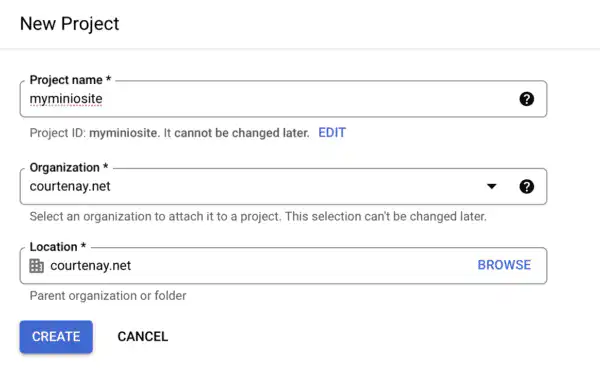
Give your project a name, such as myminiosite, and link it to your organisation. Select a location in your organisation (the root folder is fine). Click Create.
From the top of the pages dropdown, ensure the newly created project is selected before proceeding.
Create OAuth Consent Screen
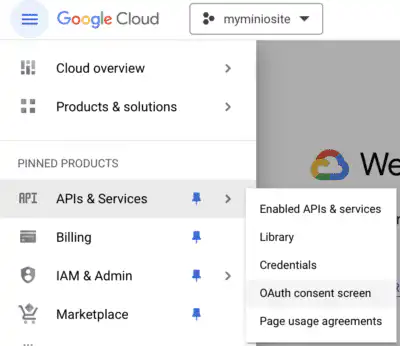
Click the menu icon at the top left of the screen and navigate to APIs & Services -> OAuth Consent Screen.
On the next screen select Internal as the User Type and then the Create button. This will limit access to the app to users in your organisation. Fill in the mandatory fields, and any non-mandatory ones you want.
- Mandatory Fields:
- App Name: The name that will appear on the login form.
- User Support Email: Use an email address you have access to.
- Authorized Domain: Put in your top level domain name. e.g. mysite.com.
- Developer Contact Information: You can reuse your email address again.
- Optional Fields
- App Logo: a 120x120px logo for the login form
- Application home page: MiniUI URL e.g. https://minioconsole.mysite.com
- Policy URL: Policy page if you have one.
- Terms of Use: Terms of Use page, again if you have one

Save and Continue to the next page.
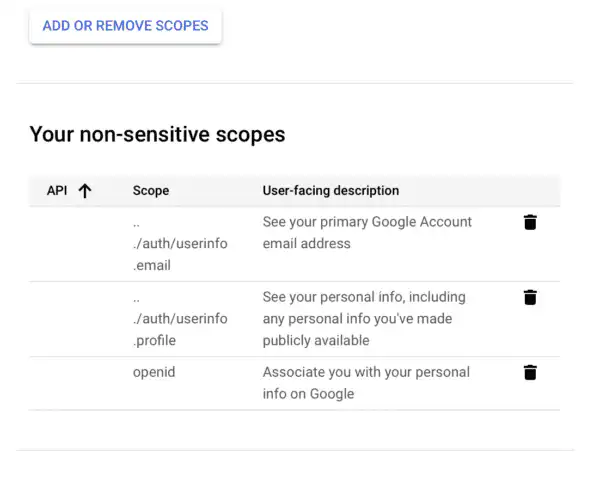
Select all of the following scopes, which will be under ‘Your non-sensitive scopes’
- profile
- openid
Save all changed to the OAuth Consent Screen.
Create OpenID Credential
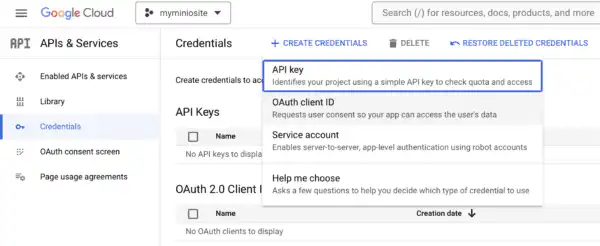
In the left hand menu, navigate to APIs & Services -> Credentials. Then select Create Credentials followed by OAuth Client ID.
Supply the following
- Application type: Web application
- Name: MinIO Console, or another name of your choice
- Authorized Javascript Origins URIs: You can leave this blank.
- Authorized redirect URIs: The address to your MinIO Console, followed by ‘oauth_callback’. e.g. https://minioconsole.mysite.com/oauth_callback

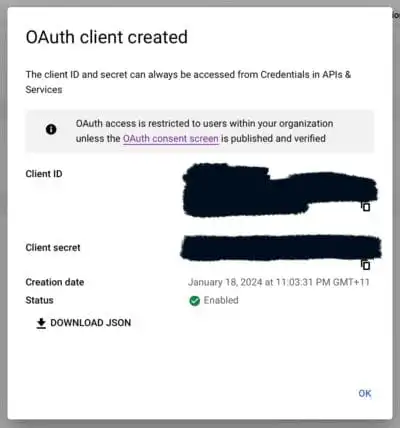
Click Create.
Make sure you record/save the Client ID and Client Secrets. You may want to download the json file, but at minimum record the values somewhere.
Configure MinIO
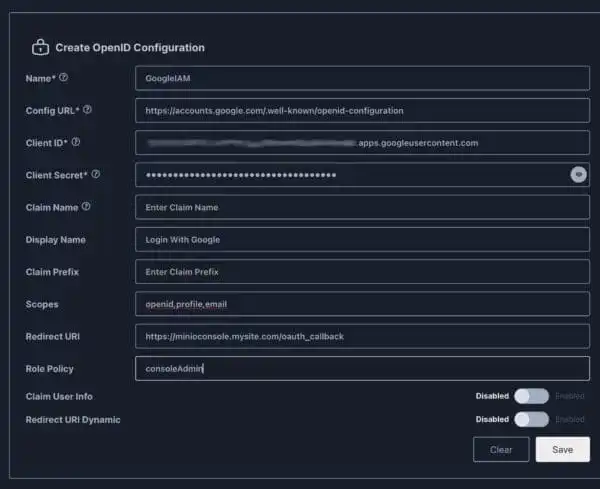
Now jump over to MinIO, log in and navigate to Identity -> OpenI. Press Create Configuration + and then complete the following
- Name: Any name you want. This will appear in the MinIO Admin portal.
- Config URL: https://accounts.google.com/.well-known/openid-configuration
- Client ID: Client ID generated from Google app setup
- Client Secret: Client Secret generated from Google app setup
- Client Name: Can be left blank
- Display Name: Text on Login button for MinIO. e.g. “Login with Google”
- Claim Prefix: Can be left blank
- Scopes: openid,profile,email
- Redirect URI: Your site followed by “oauth_callback”. e.g. https://minioconsole.mysite.com/oauth_callback
- Role Policy: consoleAdmin (or other role)
- Claim User Info: Disabled
- Redirect URI Dynamic: Disabled
Click Save when done. If prompted click the restart service link at the top of the page.
Now test the changes. Log out of MinIO or use another browser. On the login page change the login method to be your new OpenID provider.
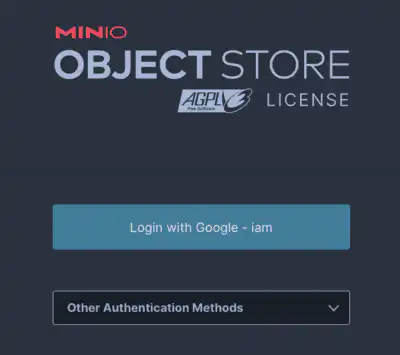
Click login and you should be redirected to Google’s site with the OAuth Consent screen from much earlier on displayed. Log in and you should be redirected back to your MinIO instance.
If you run into errors, one place to check initially will be the NGINX configuration page for your portal and in particular that you have fully implemented the required response headers. See Part 1 for details on Nginx setup. If needed you can always log back in as your root account with your username and password to check the OpenID configuration, or start over.
Disable Root Login
When you have confirmed login is working properly, I recommend disabling login via the root account given it uses username and password. Root is not using your newly set up OpenID integration and this account does not have MFA enabled. Disabling root login is a change you apply at the docker configuration. You can easily re-enable root access if you ever need to, even if you lose access to the console because you forget your credentials or your OpenID integration breaks.
In an SSH session navigate to the docker-compose directory (e.g. ~/minio). Edit the Docker-Compose file, adding “MINIO_API_ROOT_ACCESS=off” to the environment values.
The Docker-Compose file will look something like the following.
version: "3.7"

services:
  minio:
    image: quay.io/minio/minio
    command: server --console-address ":9001" /mnt/data
    environment:
      - MINIO_ROOT_USER=YourRootUser
      - MINIO_ROOT_PASSWORD=YourRootPassword
      - MINIO_API_ROOT_ACCESS=off
    volumes:
      - type: bind
        source: /mnt/data/minio
        target: /mnt/data
    ports:
      - 9000:9000
      - 9001:9001
volumes:
  minio_data:
When done restart Docker.
docker compose down && docker compose up -dWait for the Docker to start up, and then navigate to your MinIO login screen. Attempt to log in manually with your root user. Confirm that the login fails now. Confirm you can still login with your OpenID user.
Again, if you ever need to undo this you can revert the previous change to re-enable root login.
Conclusion
And that’s it. You now have MFA available for your MinIO admin console, and can use any methods supported by your Google account to log in.
Update: I’ve now added Configuring MinIO Part 3: Site to Site Replication.