
I’ve been keen to give Nextcloud a spin after hearing the products name come up quite often in discussions concerning open source solutions that people find to be absolute game changers. For those unaware, Nextcloud is a platform not unlike Google Workspace or O365, and allows admin to make various productivity tools available such as email or calendar clients, file management, and document editing. Being self hosted, it’s a way to break away from the big players in the space and deploy a solution where you solely own the data. I haven’t used Nextcloud enough to say whether it is actually worth your time or something I can replace those other commercial suites with, but did feel compelled to document the steps required to set the product up.
In this guide I’ll be deploying Nextcloud using the All-In-One (AIO) install method, which is a newer docker based approach that is presented nowadays as the recommended means to install Nextcloud. Direct install to the OS is still available. Nextcloud is being setup to be externally accessible and not just limited to a local network.
Along with the installation of Nextcloud, I’ll be looking at the steps taken to secure aspects of the administrative interface. The AIO installer will install Nextcloud itself as well as an Admin UI for managing containers etc that I believe to be unique to this deployment method. It’s this secondary interface that many recommend not be published to the internet (it allows changing of some low level stuff), however it was a bit of a struggle to find information on how to achieve this in a manner where the frontend could be accessed from anywhere and the backend on demand without relaxing firewalls constantly. I ultimately added a Wireguard VPN to the setup and then restricted the admin UI to access via the VPN. I’ll go over that here.
Prerequisites
Before starting have the following set up:
- Have a server setup and updated.
- Docker and Docker Compose installed.
- Nginx installed.
Configure Nextcloud Docker Container
As a non-root user, create a folder for your Nextcloud docker instance. For example:
mkdir ~/nextcloudNavigate to this folder and create a docker-compose.yaml file
nano docker-compose.yamlPopulate with the following
services:
  nextcloud-aio-mastercontainer:
    image: nextcloud/all-in-one:latest
    hostname: nextcloud-aio
    init: true
    restart: unless-stopped
    container_name: nextcloud-aio-mastercontainer # This line is not allowed to be changed as otherwise AIO will not work correctly
    volumes:
      - nextcloud_aio_mastercontainer:/mnt/docker-aio-config # This line is not allowed to be changed as otherwise the built-in backup solution will not work
      - /var/run/docker.sock:/var/run/docker.sock:ro # May be changed on macOS, Windows or docker rootless. See the applicable documentation. If adjusting, don't forget to also set 'WATCHTOWER_DOCKER_SOCKET_PATH'!
    ports:
      #- 80:80 # Can be removed when running behind a web server or reverse proxy (like Apache, Nginx, Cloudflare Tunnel and else). See https://github.com/nextcloud/all-in-one/blob/main/reverse-proxy.md
      - 8080:8080
      #- 8443:8443 # Can be removed when running behind a web server or reverse proxy (like Apache, Nginx, Cloudflare Tunnel and else). See https://github.com/nextcloud/all-in-one/blob/main/reverse-proxy.md
    environment: # Is needed when using any of the options below
       - APACHE_PORT=11000 # Is needed when running behind a web server or reverse proxy (like Apache, Nginx, Cloudflare Tunnel and else). See https://github.com/nextcloud/all-in-one/blob/main/reverse-proxy.md
       - APACHE_IP_BINDING=0.0.0.0 # Should be set when running behind a web server or reverse proxy (like Apache, Nginx, Cloudflare Tunnel and else) that is running on the same host. See https://github.com/nextcloud/all-in-one/blob/main/reverse-proxy.md

volumes: # If you want to store the data on a different drive, see https://github.com/nextcloud/all-in-one#how-to-store-the-filesinstallation-on-a-separate-drive
  nextcloud_aio_mastercontainer:
    name: nextcloud_aio_mastercontainer # This line is not allowed to be changed as otherwise the built-in backup solution will not work
Save the file. Do not start the docker container just yet.
Configure Nginx
Nginx should already be installed, but if it isn’t do that first. Then create a new server configuration. Replace nextcloud.yoursite.com with your own domain.
nano /etc/nginx/sites-enabled/nextcloud.yoursite.comPaste the following
map $http_upgrade $connection_upgrade {
    default upgrade;
    '' close;
}

server {
    server_name nextcloud.yoursite.com;

    location / {
        proxy_pass http://127.0.0.1:11000$request_uri;

        proxy_set_header X-Forwarded-For $proxy_add_x_forwarded_for;
        proxy_set_header X-Forwarded-Port $server_port;
        proxy_set_header X-Forwarded-Scheme $scheme;
        proxy_set_header X-Forwarded-Proto $scheme;
        proxy_set_header X-Real-IP $remote_addr;
        proxy_set_header Accept-Encoding "";
        proxy_set_header Host $host;

        client_body_buffer_size 512k;
        proxy_read_timeout 86400s;
        client_max_body_size 0;

        # Websocket
        proxy_http_version 1.1;
        proxy_set_header Upgrade $http_upgrade;
        proxy_set_header Connection $connection_upgrade;
    }

}
Save the file then set up SSL for your site. Follow the Let’s Encrypt guide.
Accessing Nextcloud
At this point, stop and give some consideration as to how you want to work with Nextcloud. The following points are important and relate to how the administration console for the AIO admin tools is accessed. This AIO portion of the administration is seperate to the Nextcloud general admin UI, and concerns management of the underlying docker setup such as updating and deployment of containers, configuration of timezones and has password reset capabilities.
Considerations are:
- If you start the docker container as it is currently configured, Nextcloud will start up. However, due to how Docker handles its networking, it will implement configuration that will bypass your firewall. In particular your Nextcloud instance will be accessible on port 8080 which is the admin interface. The initial password to configure the service will also need to be obtained by accessing the service on port 8443 (some minor tweaks will be needed to access 8443 temporarily). Ongoing the admin panel will be publicly accessible, with a token needed to authenticate to it (that the main Nextcloud instance on port 443 will supply). It’s potentially a small risk, but given this interface does not support MFA you may prefer to keep this interface private.
- You can choose to prevent access to port 8443/8080, except for periods you need to access the admin UI. The default behaviour where Docker networks bypass the firewall will be modified to ensure the firewall rules apply to dockers ports. You can, if you want, then allow port 8080 as needed and then block the port when it isn’t. This is done with the knowledge there is still ticket authentication required to access the UI to add some protection. This is a bit of a middle ground.
- You can do as this guide will, and prevent internet access to 8080 by updating the network configuration to respect firewall rules for the docker container. To allow administration of Nextcloud, a Wireguard VPN will be configured to allow your trusted devices to access the administration interface only while connected to the VPN.
Ensure UFW Firewall Rules Apply to Docker Ports
Ensure UFW will prevent direct public access to Dockers published ports. Access will be limited to the Nginx reverse proxy.
Edit UFW rules
nano /etc/ufw/after.rulesAt the end of the file, paste the following in full and save the file.
# BEGIN UFW AND DOCKER
*filter
:ufw-user-forward - [0:0]
:ufw-docker-logging-deny - [0:0]
:DOCKER-USER - [0:0]
-A DOCKER-USER -j ufw-user-forward

-A DOCKER-USER -j RETURN -s 10.0.0.0/8
-A DOCKER-USER -j RETURN -s 172.16.0.0/12
-A DOCKER-USER -j RETURN -s 192.168.0.0/16

-A DOCKER-USER -p udp -m udp --sport 53 --dport 1024:65535 -j RETURN

-A DOCKER-USER -j ufw-docker-logging-deny -p tcp -m tcp --tcp-flags FIN,SYN,RST,ACK SYN -d 192.168.0.0/16
-A DOCKER-USER -j ufw-docker-logging-deny -p tcp -m tcp --tcp-flags FIN,SYN,RST,ACK SYN -d 10.0.0.0/8
-A DOCKER-USER -j ufw-docker-logging-deny -p tcp -m tcp --tcp-flags FIN,SYN,RST,ACK SYN -d 172.16.0.0/12
-A DOCKER-USER -j ufw-docker-logging-deny -p udp -m udp --dport 0:32767 -d 192.168.0.0/16
-A DOCKER-USER -j ufw-docker-logging-deny -p udp -m udp --dport 0:32767 -d 10.0.0.0/8
-A DOCKER-USER -j ufw-docker-logging-deny -p udp -m udp --dport 0:32767 -d 172.16.0.0/12

-A DOCKER-USER -j RETURN

-A ufw-docker-logging-deny -m limit --limit 3/min --limit-burst 10 -j LOG --log-prefix "[UFW DOCKER BLOCK] "
-A ufw-docker-logging-deny -j DROP

COMMIT
# END UFW AND DOCKER
After saving the file restart the UFW service.
sudo systemctl restart ufwThere’s a good breakdown of what the above settings do at the following GitHub page.
Configure Wireguard
To add Wireguard support, update the contents of the docker-compose.yaml file created earlier with the following.
networks:
  nextcloud-vpn-network:
    name: nextcloud-vpn-network
    driver: bridge
    ipam:
      config:
        - subnet: 10.5.0.0/16
          gateway: 10.5.0.1

services:
  nextcloud-aio-mastercontainer:
    image: nextcloud/all-in-one:latest
    hostname: nextcloud-aio
    init: true
    restart: unless-stopped
    container_name: nextcloud-aio-mastercontainer # This line is not allowed to be changed as otherwise AIO will not work correctly
    volumes:
      - nextcloud_aio_mastercontainer:/mnt/docker-aio-config # This line is not allowed to be changed as otherwise the built-in backup solution will not work
      - /var/run/docker.sock:/var/run/docker.sock:ro # May be changed on macOS, Windows or docker rootless. See the applicable documentation. If adjusting, don't forget to also set 'WATCHTOWER_DOCKER_SOCKET_PATH'!
    ports:
      #- 80:80 # Can be removed when running behind a web server or reverse proxy (like Apache, Nginx, Cloudflare Tunnel and else). See https://github.com/nextcloud/all-in-one/blob/main/reverse-proxy.md
      - 8080:8080
      #- 8443:8443 # Can be removed when running behind a web server or reverse proxy (like Apache, Nginx, Cloudflare Tunnel and else). See https://github.com/nextcloud/all-in-one/blob/main/reverse-proxy.md
    environment: # Is needed when using any of the options below
       - APACHE_PORT=11000 # Is needed when running behind a web server or reverse proxy (like Apache, Nginx, Cloudflare Tunnel and else). See https://github.com/nextcloud/all-in-one/blob/main/reverse-proxy.md
       - APACHE_IP_BINDING=0.0.0.0 # Should be set when running behind a web server or reverse proxy (like Apache, Nginx, Cloudflare Tunnel and else) that is running on the same host. See https://github.com/nextcloud/all-in-one/blob/main/reverse-proxy.md

    networks:
      nextcloud-vpn-network:
        ipv4_address: 10.5.0.100

  wireguard:
    container_name: wireguard
    image: linuxserver/wireguard
    environment:
      - PUID=1000
      - PGID=1000
      - TZ=Australia/Canberra
      - SERVERURL={YOUR-SERVERS-IP}
      - SERVERPORT=51820
      - PEERS=iphone
      - PEERDNS=auto
      - INTERNAL_SUBNET=10.13.13.0
      - ALLOWEDIPS={YOUR-SERVERS-IP},10.13.13.0/24,10.5.0.0/16
    ports:
      - 51820:51820/udp
    volumes:
      - type: bind
        source: ./wireguard-config/
        target: /config/
      - type: bind
        source: /lib/modules
        target: /lib/modules
    restart: unless-stopped
    cap_add:
      - NET_ADMIN
      - SYS_MODULE
    sysctls:
      - net.ipv4.conf.all.src_valid_mark=1
    networks:
      - nextcloud-vpn-network

volumes: # If you want to store the data on a different drive, see https://github.com/nextcloud/all-in-one#how-to-store-the-filesinstallation-on-a-separate-drive
  nextcloud_aio_mastercontainer:
    name: nextcloud_aio_mastercontainer # This line is not allowed to be changed as otherwise the built-in backup solution will not work
The changes we have made are to add the Wireguard docker-compose config and a user defined network to span the Wireguard and Nextcloud containers. I chose to set a static internal IP for the NextGuard container of 10.5.0.100 to make accessing it via the VPN simpler.
Ensure you replace {YOUR-SERVERS-IP} with the public IP of your server. It is vital that you do this in both the SERVERURL and ALLOWEDIPS sections. You probably also want to update the timezone. For a list of timezones see this link.
Lastly add one or more peers, which corresponds to an entry per a device you will use the VPN with. You can specify just a number (e.g. replace “iPhone” above with the number 3 to generate configuration for 3 peers numbers 1 through to 3, or specify names in an alphanumeric comer separated list. The advantage of a name is that it may be more easy to recognise which peer is which device. You can always add additional devices or increase the number of peers by editing the config file and restarting docker compose.
Also create the following config folder for Wireguard, which will be home to Wireguard configuration including peer devices.
mkdir ~/nextcloud/wireguard-configLastly add a firewall rule to allow the VPN to connect to your server.
sudo ufw allow 51820
sudo ufw status
Initial Setup
Everything is in place now to allow the services to be started, the VPN connected to, and NextGuard setup completed.
First, from the Nextcloud docker directory start the services
docker compose up -dWait a few moments for the services to start. Then it is time to connect to the VPN. Ensure you have Wireguard installed on a device such as your phone, then on your server execute the following command to bring up the VPN configuration:
docker exec -it wireguard /app/show-peer iphoneYou can alternatively use the number if you did not specify a name (replace “iPhone” with 1, 2, etc).
Scan the barcode using the Wireguard application to create the VPN configuration. If you cannot scan the code, navigate into the wireguard-config directories and grab the configuration from the peers folders. Grab the ‘peer_{peer name}.conf’ file and load it into your Wireguard client.
Connect to the VPN with your device and then in a browser navigate to your servers IP. Having done this run the following command and confirm that you have seen a traffic handshake entry:
docker exec wireguard wg showThe output will be something like this:
peer:
  preshared key: (hidden)
  endpoint: 111.26.10.123:26220
  allowed ips: 10.13.13.2/32
  latest handshake: 32 seconds ago
  transfer: 129.89 KiB received, 415.08 KiB sent
With the VPN connectivity established, its time to set up Nextcloud.
First confirm on a system without the VPN than you cannot access your Nextcloud set on port 8080 (https://nextcloud.yoursite.com:8080) or 8443 (https://nextcloud.yoursite.com:8443). If you can, check your firewall is only permitting port 443 (and 22 for SSH).
On your VPN connected device, visit the address https://10.5.0.100:8080 and observe that on this device connectivity is possible. Note that as you are using an IP and not hostname, that you will need to accept a certificate error.
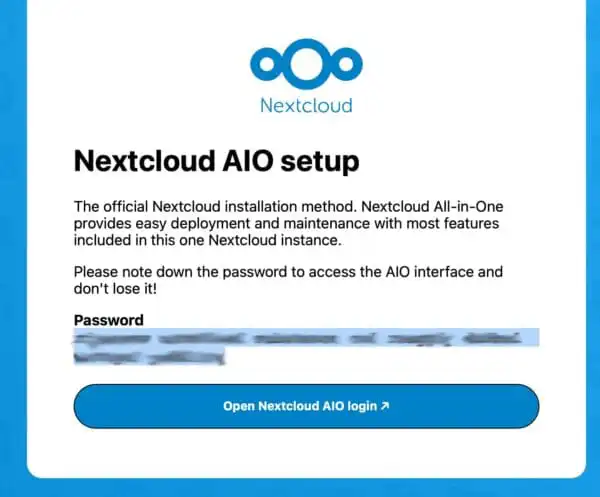
In some cases I have found this page redirect to https://10.5.0.100:8080/setup with the passphrase needed to login to the AIO console on it, but this can be a bit sporadic. If this loads, note the pass phrase. If you do not get this and instead jump straight to the login page, you can always reveal the passphrase directly via the docker container.
docker exec nextcloud-aio-mastercontainer grep password /mnt/docker-aio-config/data/configuration.jsonCopy the passphrase and then enter it on https://10.5.0.100:8080/login to proceed to the AIO admin console.
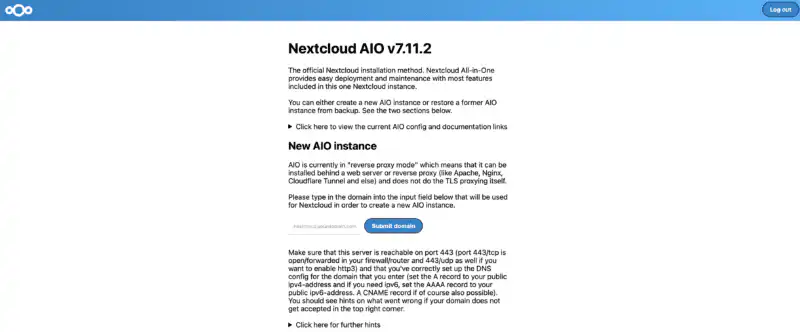
In the ‘New AIO Instance’ field enter your public facing domain name and click submit. If there are no errors a few more options will appear.
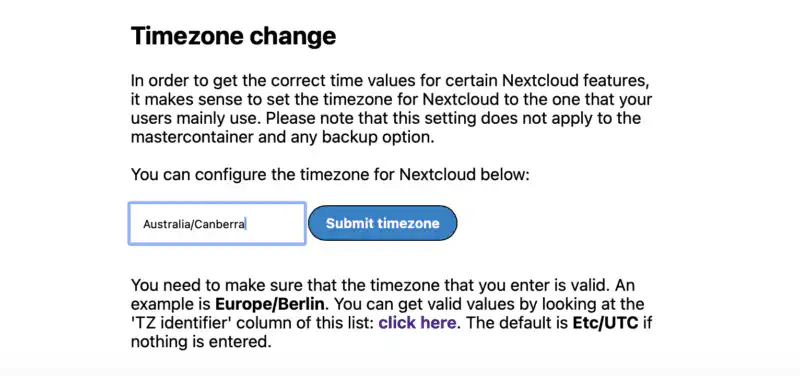
First scroll to the very bottom of the page and input a timezone. Save this.
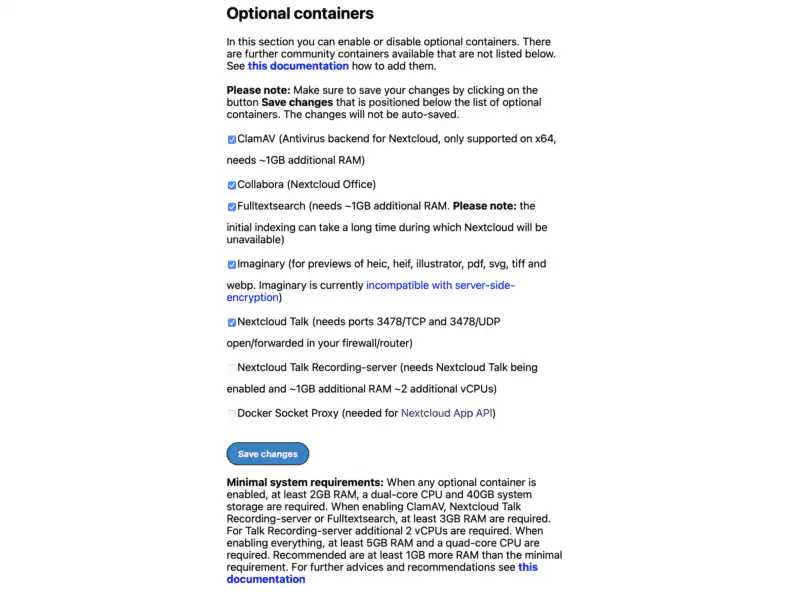
Next review the Optional Containers to be deployed. Add or remove any that you want to change. Pay attention to any notes regarding resource limits of your server. Save any changes.
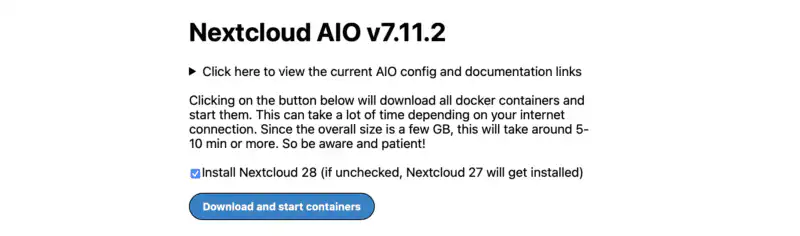
Lastly we will download any containers and start the service. You may be presented with an option to install the very latest release, otherwise the system will default to the previous one. It is up to you which you choose, although I have gone with the latest in my install. Click the ‘Download and start containers’ button when ready.
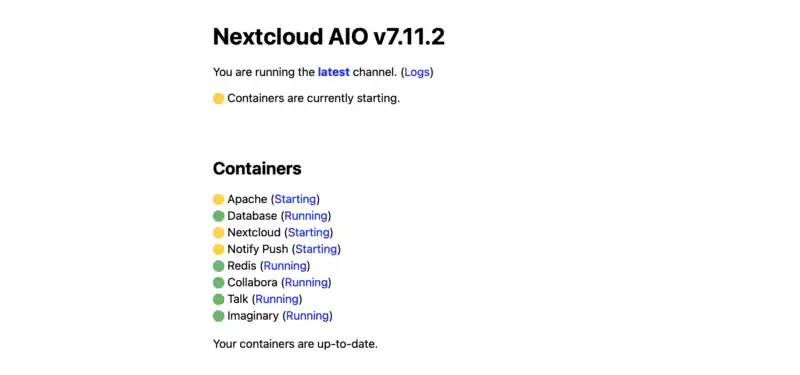
The startup can take quite some time so be patient. Eventually you will see some status symbols that will attempt to track the startup. I have found that these can get to a point where they will not automatically update. Refreshing the page is OK and can help with understanding where things are at. When all lights are green, we’re good to move on.
You’ll be presented with the initial admin username and password.
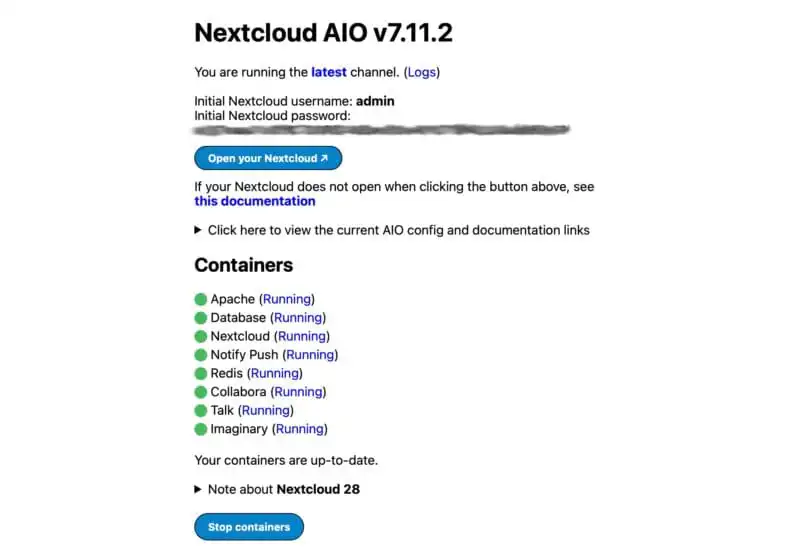
Note this, then navigate to your public URL (e.g. nextcloud.yoursite.com). You’ll be greeted with the login screen.
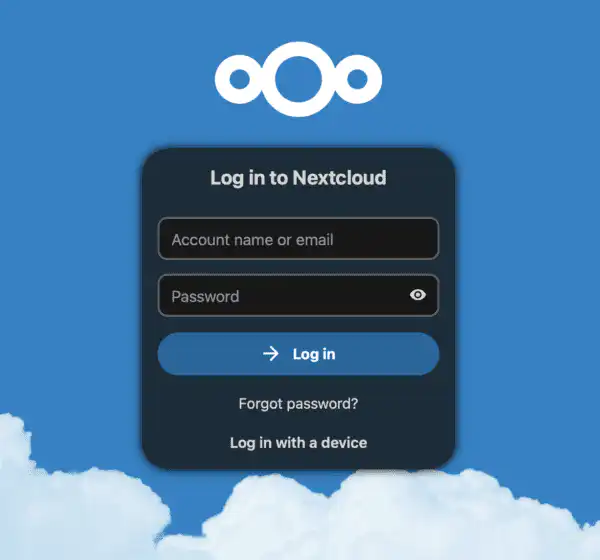
Enter your username and password and you’re in.
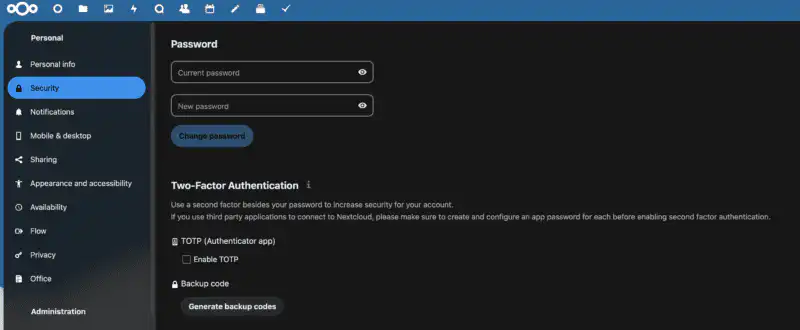
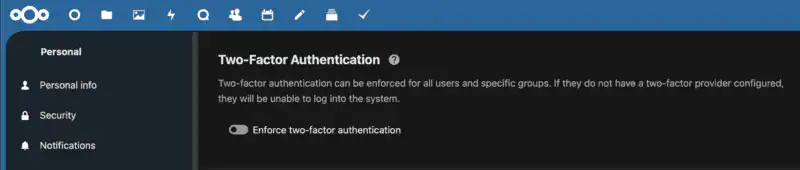
The first thing I would do is to navigate to the admin accounts profile and set a new password. Enable MFA now for your admin user and consider making it a requirement for all future users in the administration settings.
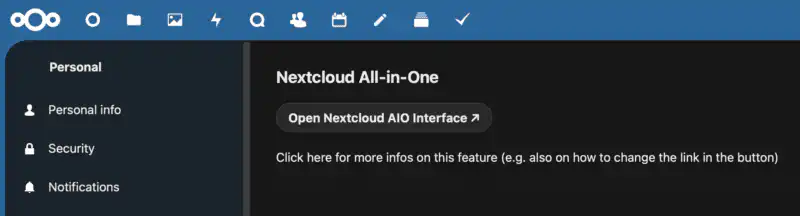
After this you’re good to go. Moving forward if you want to administer the service you can log in with your admin account and go to the Administration section of Nextcloud. As mentioned earlier in the article, updates and container configuration is done on the seperate interface that is on port 8080 that we did not make publicaly accessible. Whenever you want to access the AIO UI, turn on your VPN then log into Nextcloud and navigate to the AIO Admin Pane. As the admin UI will include a token in the URL, this is going to be easier than navigating direct. When done you can turn off your VPN if you want.
After you are set up you may choose to scan your service using https://scan.nextcloud.com. This will let you know if your service is well configured. At the time of writing I’m getting an A+ from these checks for this setup.
Conclusion
Having followed the above, Nextcloud is now running and publicly accessible so you can access it anywhere. The admin functions however have been put behind a VPN to help secure the backend. No doubt there are likely other approaches to this, and if you don’t want to be able to access NextCloud from any endpoint you could even opt to put the entire thing behind a VPN (just update the final rules). However, this approaches is one that strikes me as a good balance of access and security.